VMware vSphere Storage
To provide stateful workloads with VMware vSphere storage, we recommend creating a vSphereVolume StorageClass. This practice dynamically provisions vSphere storage when workloads request volumes through a PersistentVolumeClaim.
In order to dynamically provision storage in vSphere, the vSphere provider must be enabled. See the following pages for more: Out-of-tree vSphere and in-tree vSphere.
Prerequisites
In order to provision vSphere volumes in a cluster created with the Rancher Kubernetes Engine (RKE), the vSphere cloud provider must be explicitly enabled in the cluster options.
Creating a StorageClass
The following steps can also be performed using the kubectl command line tool. See Kubernetes documentation on persistent volumes for details.
Click ☰ > Cluster Management.
Choose the cluster you want to provide vSphere storage to and click Exlpore.
In the left navigation bar, select Storage > StorageClasses.
Click Create.
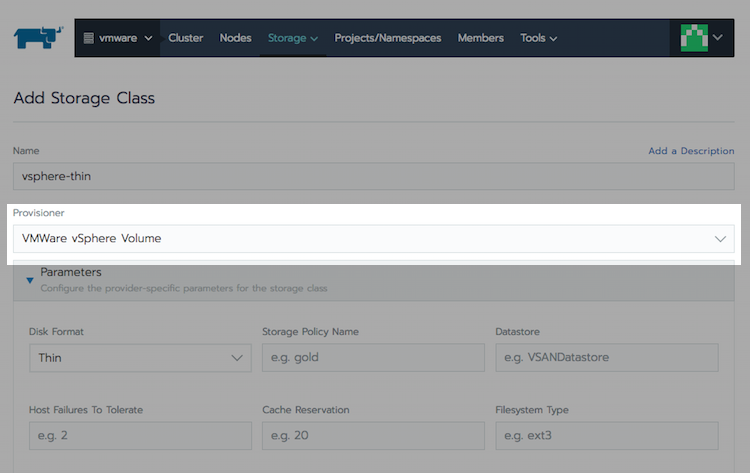
Enter a Name for the StorageClass.
Under Provisioner, select VMWare vSphere Volume.

Optionally, specify additional properties for this storage class under Parameters. Refer to the vSphere storage documentation for details.
Click Create.
Creating a Workload with a VMware vSphere Volume
- In the left navigation bar, click Workload.
- Click Create.
- Click StatefulSet.
- In the Volume Claim Templates tab, click Add Claim Template.
- Enter a persistent volume name.
- In the Storage Class field, select the vSphere StorageClass that you created.
- Enter the required Capacity for the volume. Then click Define.
- Assign a path in the Mount Point field. This is the full path where the volume will be mounted in the container file system, e.g.
/persistent. - Click Create.
Verifying Persistence of the Volume
In the left navigation bar, click Workload > Pods.
Go to the workload you just created and click ⋮ > Execute Shell.
Note the directory at root where the volume has been mounted to (in this case
/persistent).Create a file in the volume by executing the command
touch /<volumeMountPoint>/data.txt.Close the shell window.
Click on the name of the workload to reveal detail information.
Click ⋮ > Delete.
Observe that the pod is deleted. Then a new pod is scheduled to replace it so that the workload maintains its configured scale of a single stateful pod.
Once the replacement pod is running, click Execute Shell.
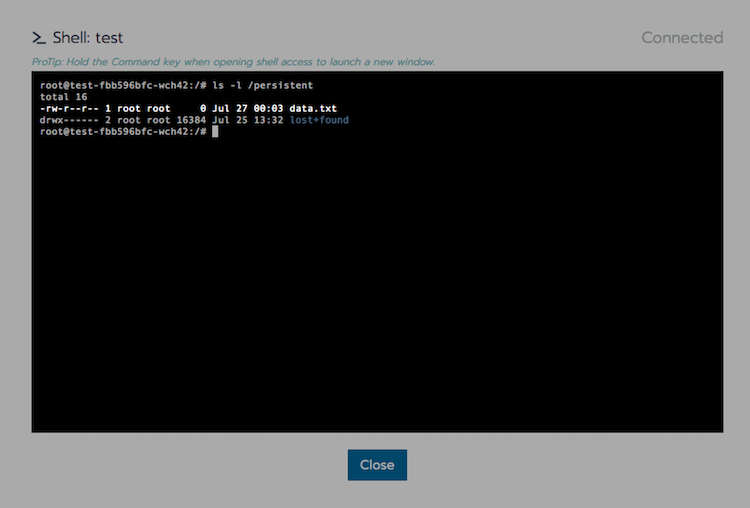
Inspect the contents of the directory where the volume is mounted by entering
ls -l /<volumeMountPoint>. Note that the file you created earlier is still present.
Why to Use StatefulSets Instead of Deployments
You should always use StatefulSets for workloads consuming vSphere storage, as this resource type is designed to address a VMDK block storage caveat.
Since vSphere volumes are backed by VMDK block storage, they only support an access mode of ReadWriteOnce. This setting restricts the volume so that it can only be mounted to a single pod at a time, unless all pods consuming that volume are co-located on the same node. This behavior makes a deployment resource unusable for scaling beyond a single replica if it consumes vSphere volumes.
Even using a deployment resource with just a single replica may result in a deadlock situation while updating the deployment. If the updated pod is scheduled to a node different from where the existing pod lives, it will fail to start because the VMDK is still attached to the other node.